Get off to a speedy start: Create an account, style your chat widget, add content and get your chatbot widget up and running on your website in minutes.
Chose a name, colour and layout to match your brand and style.
Add a welcome message!
Greet your users with a customised message before the your digital assistant is opened.
Easy to manage
Make changes, show and hide the widget and change its position on your website in seconds.
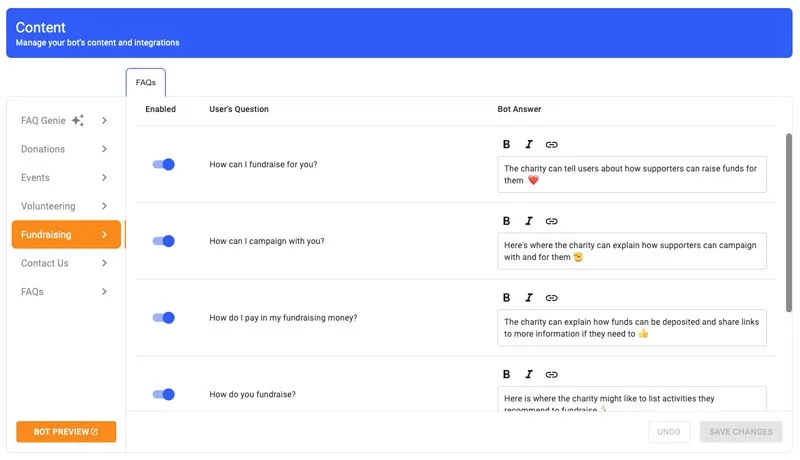
Adding content to your chatbot
Easily add content to your chatbot to help your users.
We have made it as easy as possible for you to add the content you want your chatbot to use to help users of your website. We have preloaded the clever chatbot understanding behind the scenes so that the chatbot knows what content to show based on the users inputs.
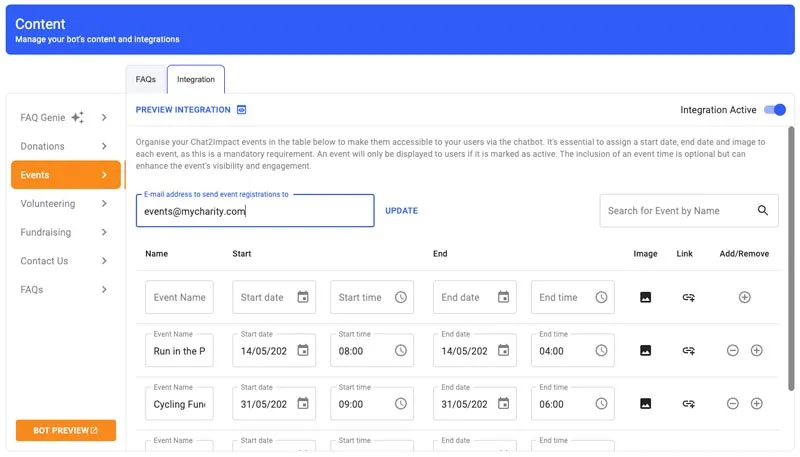
Pre-built Integrations.
Let your users contact you via forms, register for events, make donations and more, all within the chat widget.
Simple Integration Toggle
Use the toggle on each content area to make integrations active.
Allow donations via Stripe & Blacbaud Merchant Services, enable contact forms for enquireis and newsletters - all out of the box!
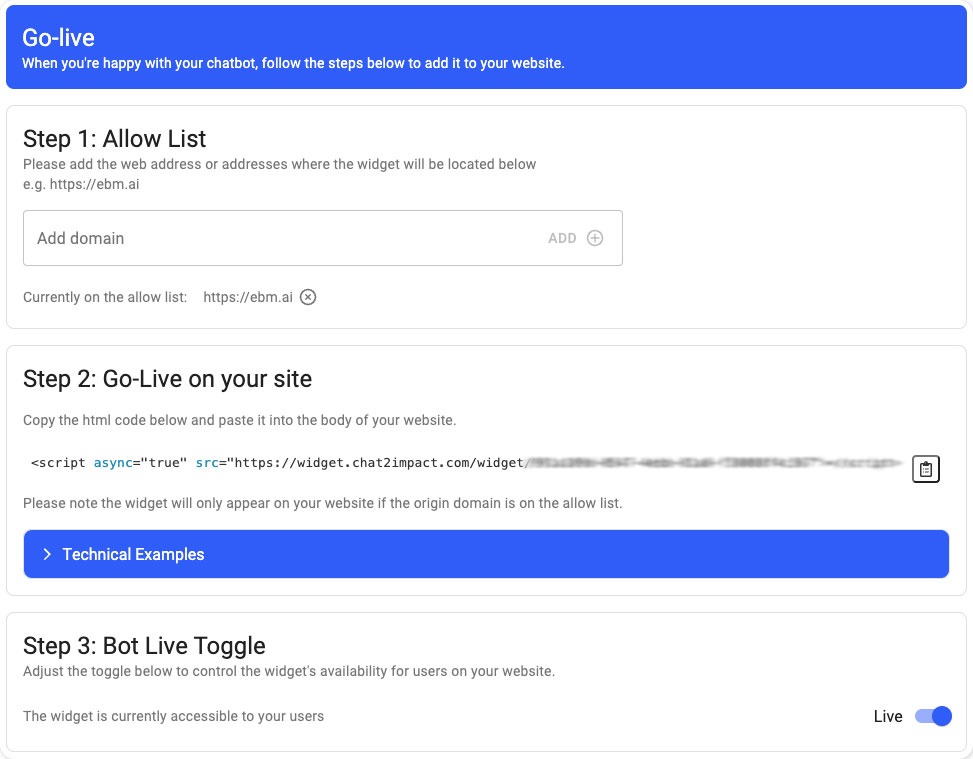
Going Live
When you’re happy with your chatbot, follow the simple steps to add it to your website.
Allow List
When you’re happy with your chatbot, follow the simple steps to add it to your website.
Add your website address (not specific pages, the main website address – ie. www.mycharity.com)
Go-Live on your site
Paste the generate code after the </body> of your website. If you use WordPress, you can download this simple WordPress approved plugin: (don’t worry, it’s free – just use the ‘Add Snippet’ button once you have activated the plugin) to add it to your site – the plugin also let’s you choose specific pages on your website too, if you don’t want it on every page.
Bot Live Toggle
Use the ‘Live’ toggle to control the widget’s availability for users on your website.
Built in Insights / Analytics to track how your bot is being used.
We’ve added analytics into your chatbot so you have sight of how people are using it – from messages and conversations to donations made and event sign ups.